
Let's Build Together - How to automatically update a Due Date in ClickUp
The Let’s Build Together series is based on real-life use cases. It is designed to expand your understanding of automation. You can easily adapt these scenarios to your current situation.

The Let’s Build Together series is based on real-life use cases. It is designed to expand your understanding of automation. You can easily adapt these scenarios to your current situation. Feel free to contribute to this series by writing an email to cristian@filimon.tech.
Automation Scenario

I’m using ClickUp and am looking for a way to automatically change the due date of overdue tasks every day. I wish it could always change my top priority tasks to today, the next priority to tomorrow, and the lowest priority to the day after tomorrow. Any ideas?
The use case is straightforward and involves only one app. The easiest way is to use the ClickUp Automation. This process is the easiest automation, even under the process detailed in the Direct Integration article.
ClickUp Automation
If you have a paid plan, you can click on the Automation button from your top right corner, and select “Tasks or subtasks” as a trigger when the “due date arrives.” You should also add that “Priority” is equal to “Urgent.”
As an action, you should select “change due date” and “Days after trigger date” specifying the number of days you want to add (one in our scenario).

Afterwards, you should replicate the same scenario for High Priority tasks and Normal Priority tasks, adding 2 and 3 days as an action.
As a result of this automation, whenever a due date arrives, ClickUp will change the due dates.
This is the easiest way to do it. Unfortunately, it involves an extra cost; you will need to upgrade your plan to a paid one.
Integration with Make
The other method is to replicate that automation from ClickUp in Make. You can do it with your free package (which allows you to create up to 2 scenarios).
The only disadvantage is when you face a large volume of tasks. This is because the method is different. Whenever you want to recalculate the due dates, you need to get all the active tasks from a specific list and send them to Make.
This method is detailed in the Workflow Automation article.
The process to recreate this in Make.com is:
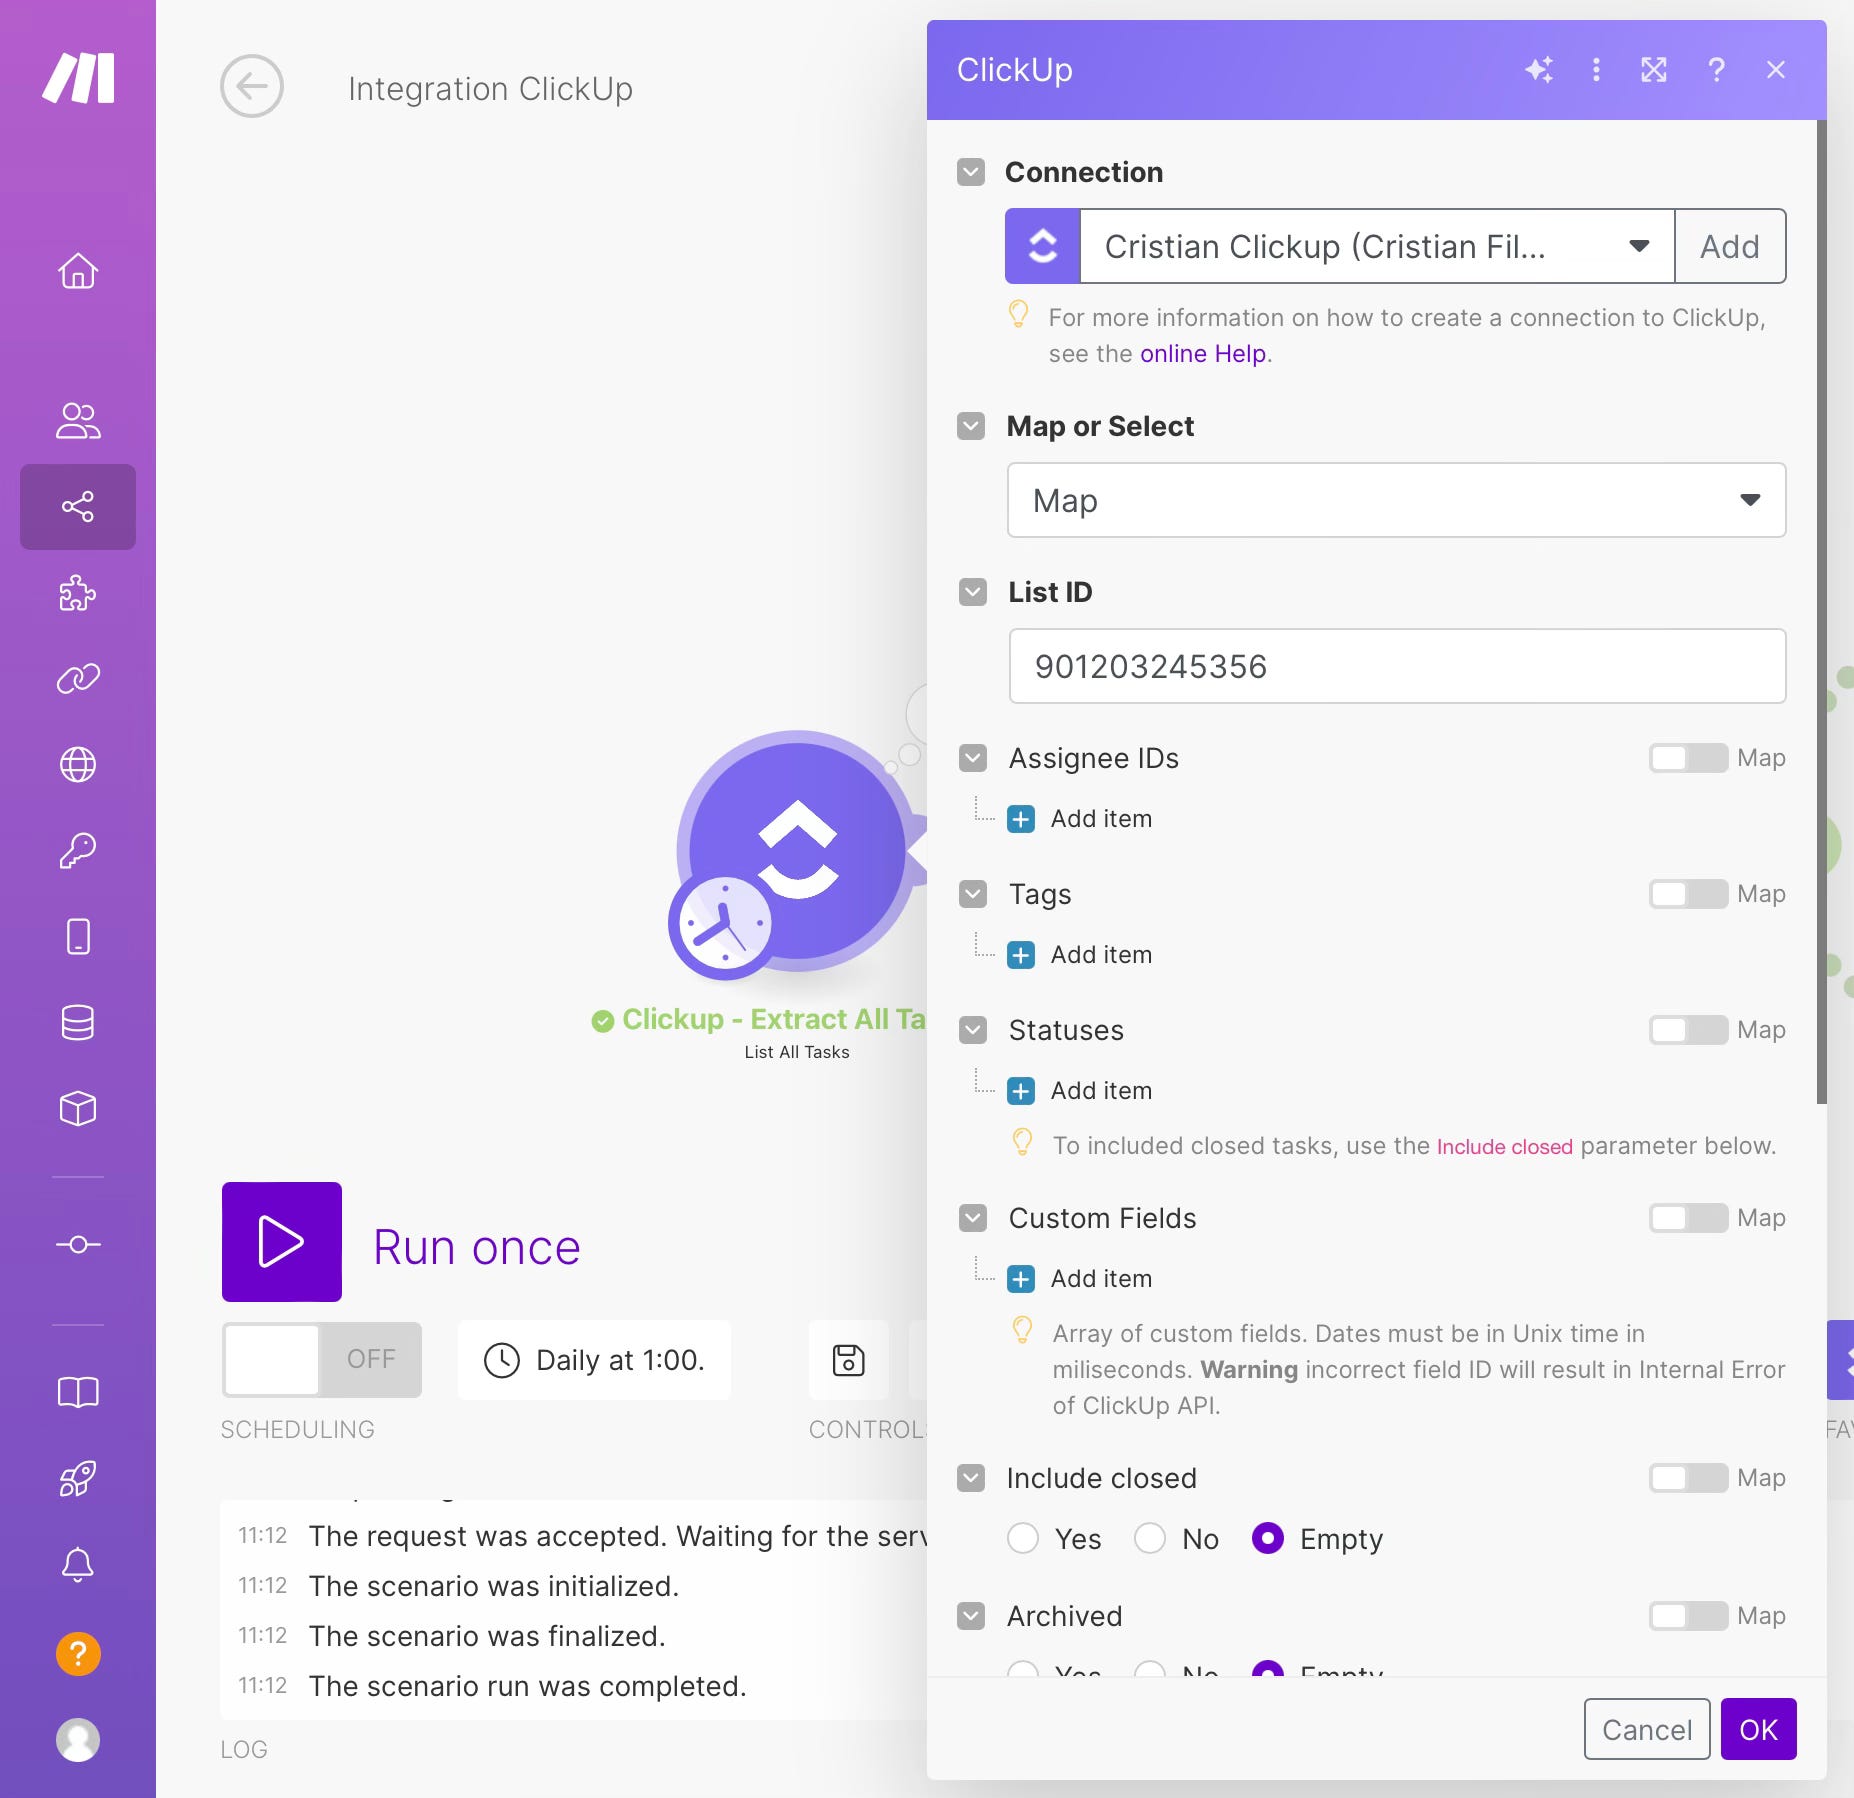
1. Get all tasks
By using the ClickUp Connector available in Make, select the “List All Tasks” module and add the List ID. You can get this ID from the “Copy Link” option in each list. Extract it from the URL, e.g., https://app.clickup.com/9010015071/v/li/901000218885 <- This one is the list ID.
The output of this module will be a series of bundles with all the tasks from that list.
2. Add a filter for overdue tasks
Let’s say that you have 20 tasks on that list, and only 3 are overdue. You should filter those overdue tasks from the beginning. Add a filter with the condition “Due date” from the previous module. Set the variable to “DateTime operators: Earlier than” and use the “Now” function from Make.
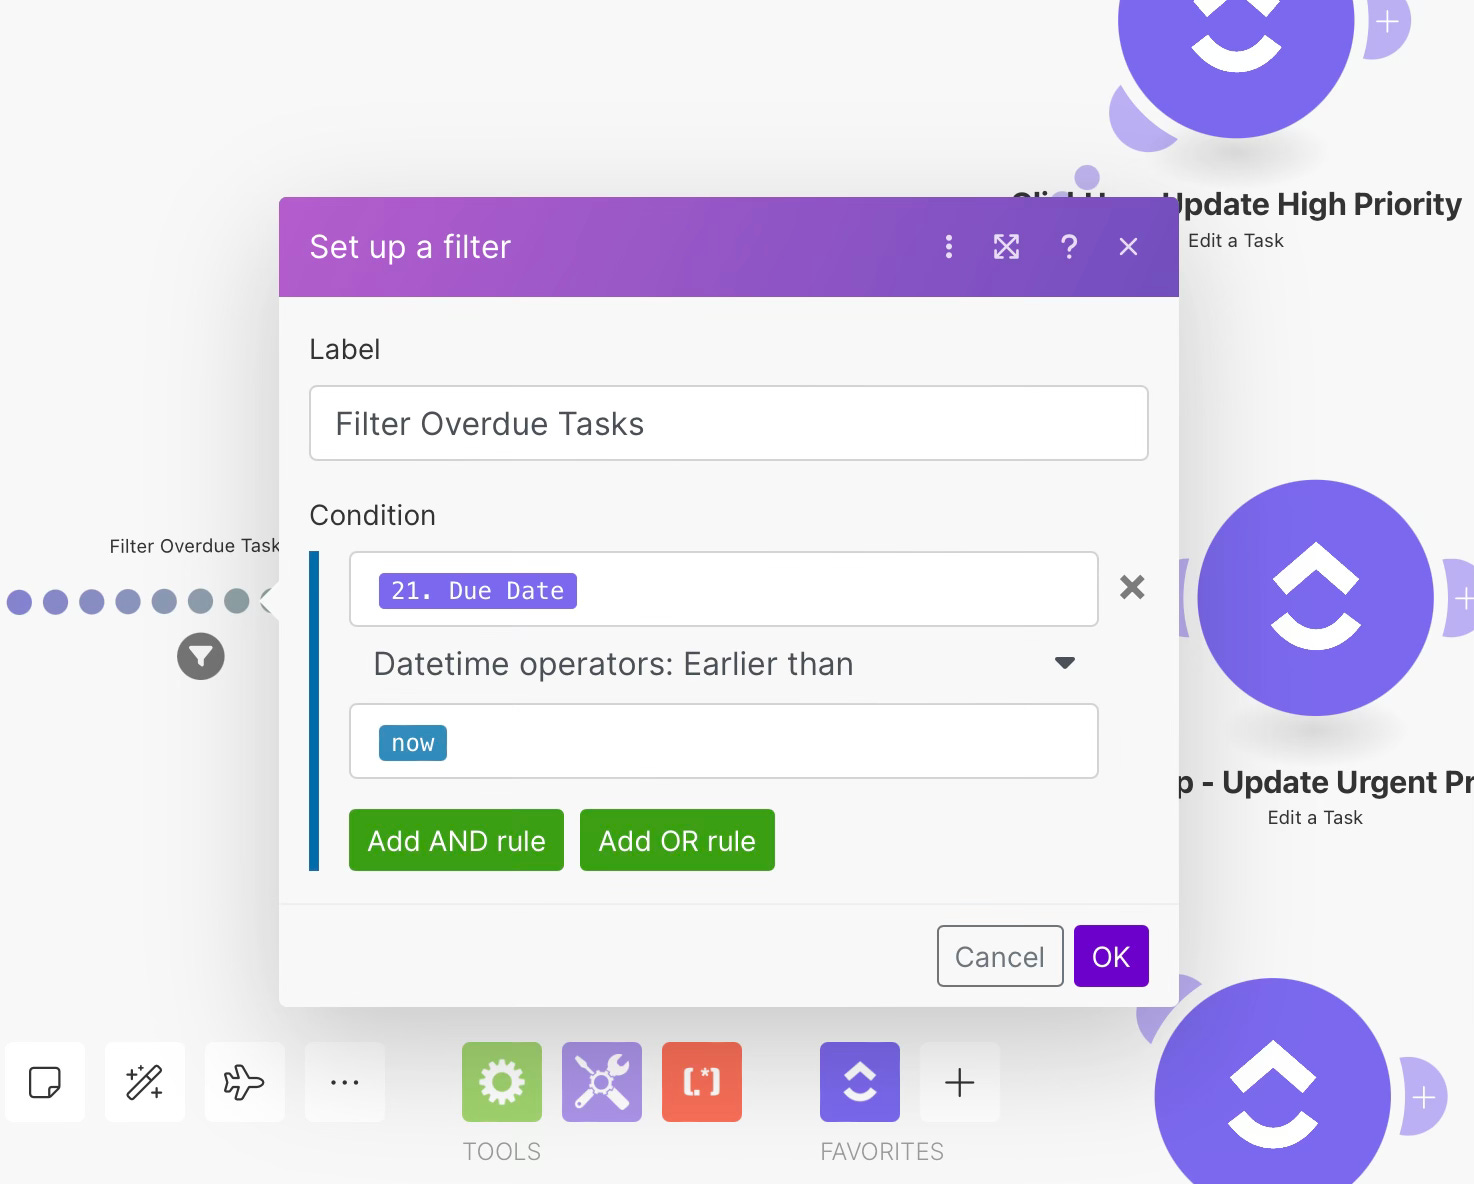
The output of this module will be the remaining tasks without the ones that aren’t overdue.
3. Add an Edit task
By using the “Edit task” module, you can update each task. Complete the Task ID from the previous module and change only the “Due date” field.
There are two possibilities here.
The advanced one is to map a function, as in Excel with the IF function, to change due dates by priority.
The easiest way is to duplicate the Edit Task module and add a filter before each module for each priority. I will detail the second method here.
For the Urgent Priority tasks, you should add “now” as a Due Date.

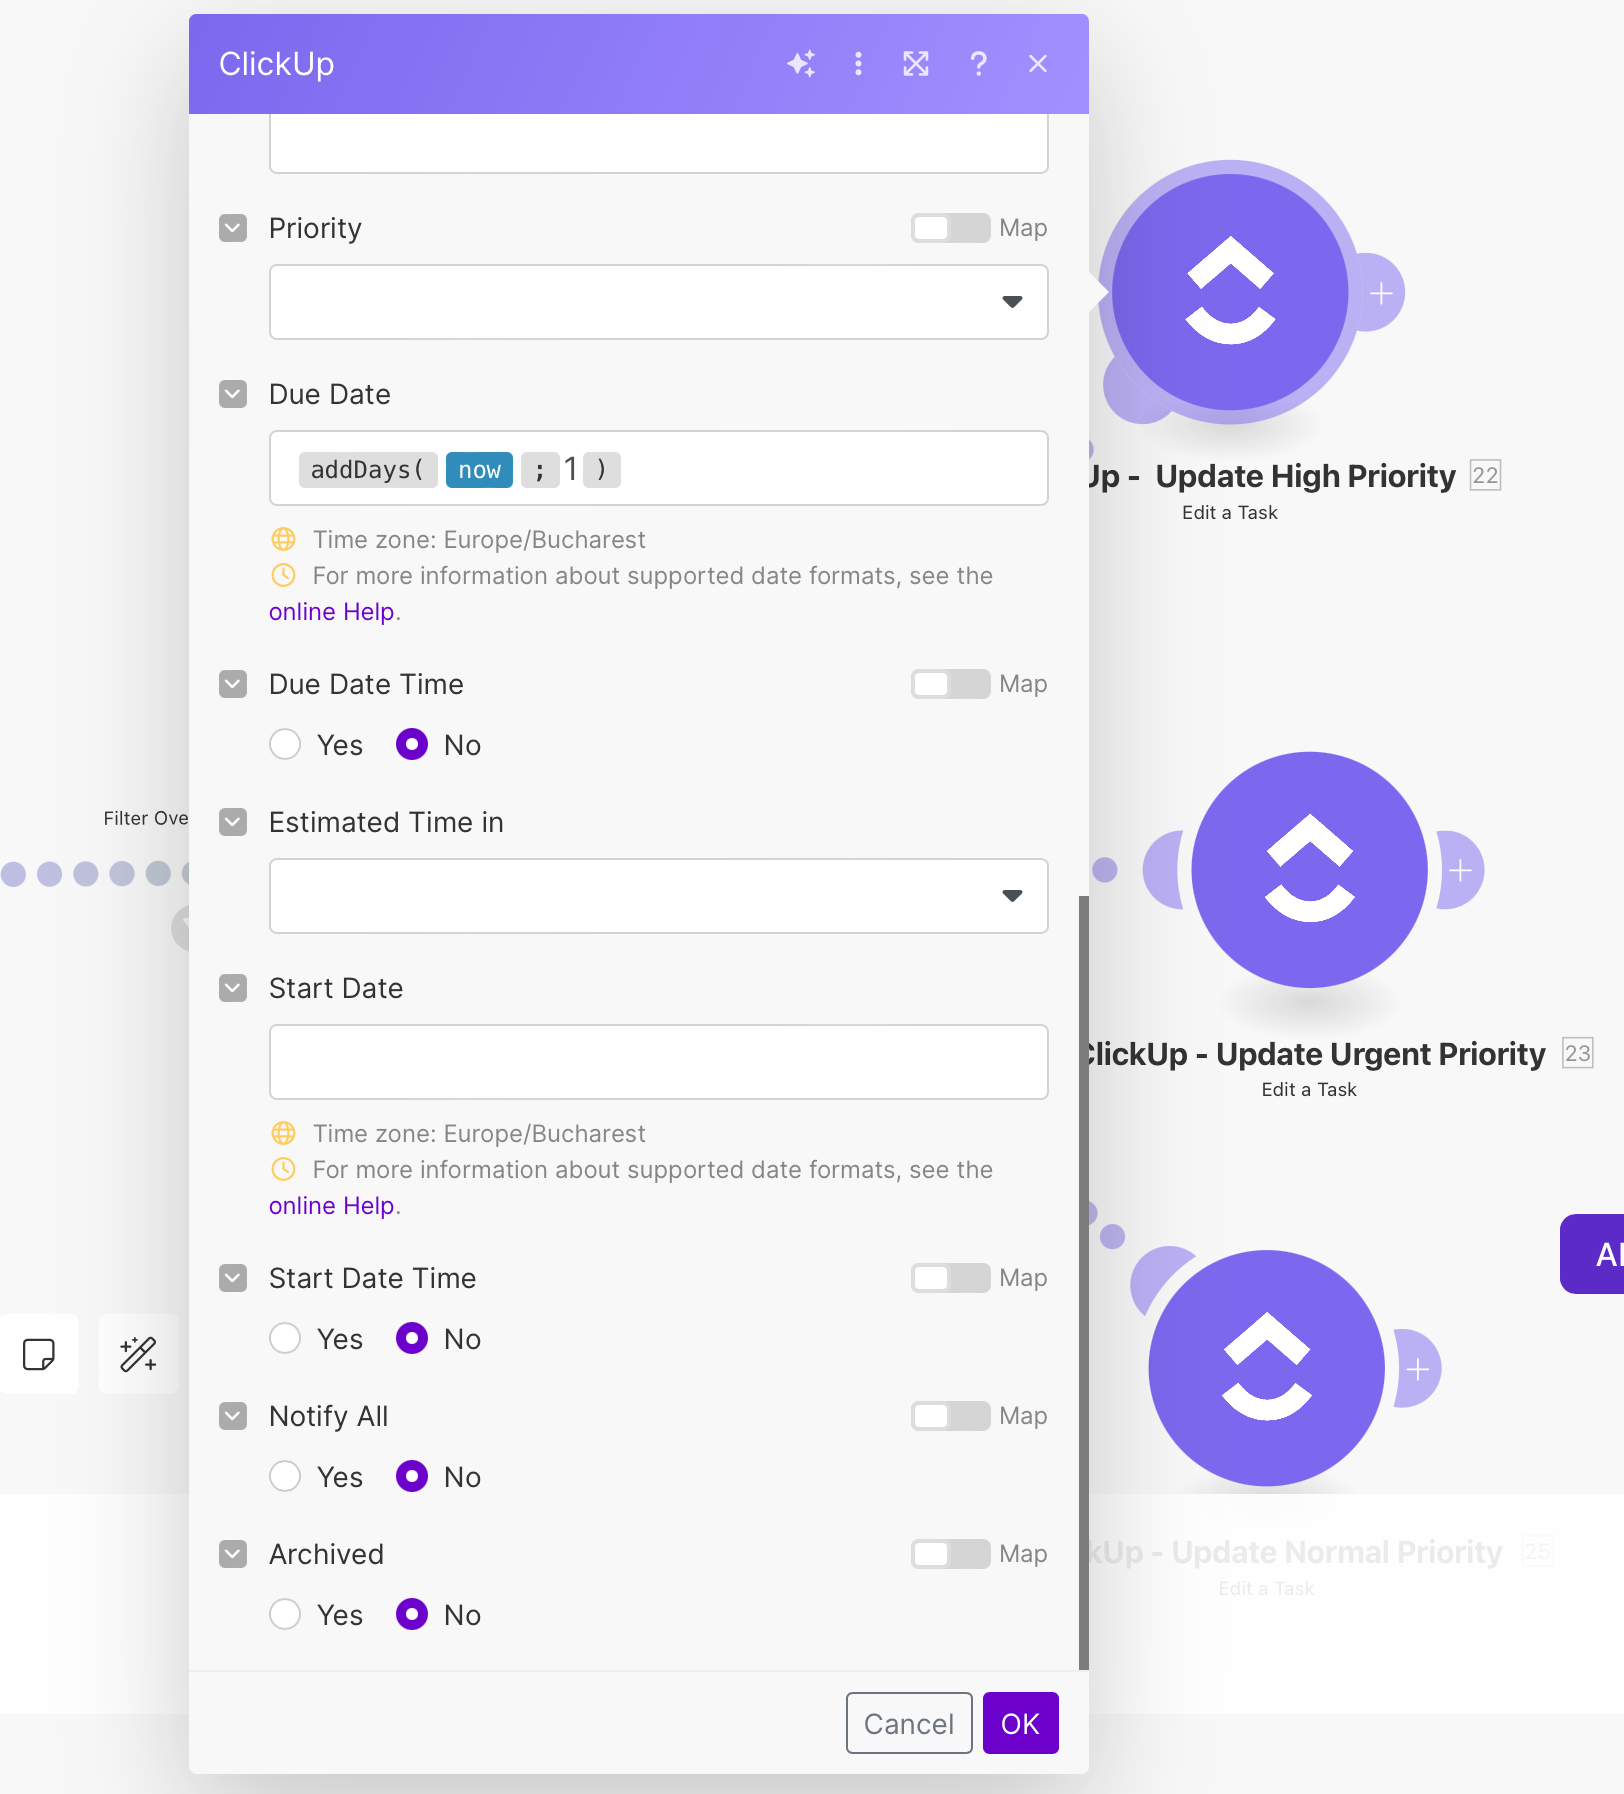
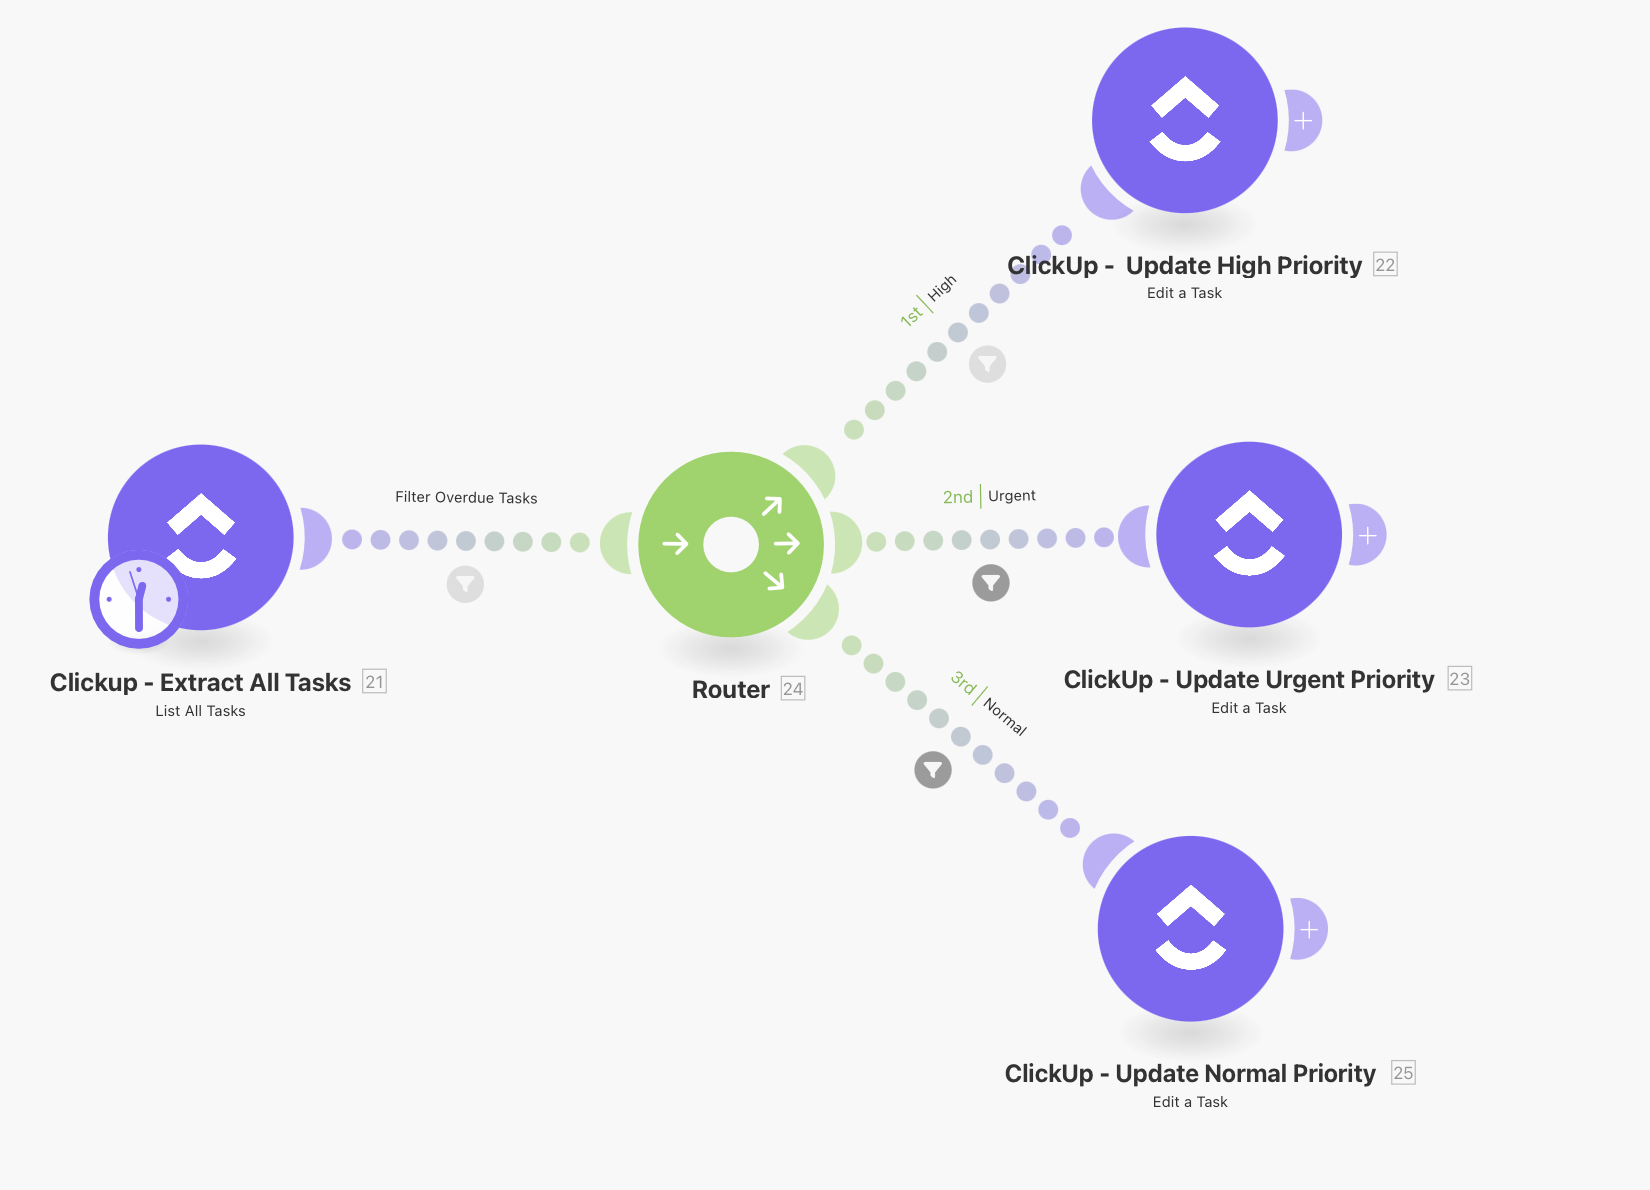
4. Duplicate the modules
Now you want to duplicate this module and connect it to the same source. Make will automatically add a Router between the “Edit Task module and the List All Tasks module.
Update the new modules. For the one with extra days (normal and high priority), add a function, “addDates”. It should be added one or two days after the “Now” function.
5. Add filters before “Edit task” modules
Use each module for only one priority. So, add filters between the Router and each module. You can do that by adding the “Priority: Priority” filter with the “urgent” variable (or “high” or “normal” for the next ones). Use “Text Operator is equal to” in this filter. Duplicate the filter before each module.

6. Test it
Create some tasks in a new list. Don’t forget to add this test List ID in the first step. Create at least two for each priority, and at least one for each priority must be overdue.
Run the scenario, and verify the results.

7. Publish the scenario
Now you can change the List ID to the current one and set a frequency for your scenario. If you want to update it daily, use “Every day” and set an hour. Activate the scenario and enjoy :)

The process is also detailed in this video, with more detailed information about Make.com functionality.
Contribute
If you want to keep this series alive please contribute to this content by sending your ideas or automation issues to cristian@filimon.tech. I will choose the best ones and create a use case based on them.